Wednesday, December 28, 2011

Ice Gallery and Ice Skating

As the cold weather approaches so does more opportunities to sight see in Korea.. Only problem is you have to be brave enough (and have enough clothing) to weather the freezing cold! When "they" said "they" send people to Korea for cold weather training, it's no joke! Cuz it's COLD here!! But the cold doesn't scare us away! On Monday we went just North of Seoul, bout an hour and a half from here, and took the kids to an ice gallery.

We got Mozart on ice...

And the ice technician....

Leave it to Jake to want to pee in the ice potty.... 

Uh, hey there wee ones... Doncha think you're a lil young to be at the bar?

After the ice gallery we pit stopped at a coffee joint for some coffee and hot cocoa to warm up and then it was back on the subway to head for some ice skating! One good, sometimes bad, thing about having cute, blonde haired, blue eyed kids in Korea is that they stand out like sore thumbs! But they get a lot of attention, and therefore people always want to do for them... So, when we went to stand in line to wait for them to open the rink back up one of the staff members stole Jamison and took him for a couple spins around the rink
Mommy stayed back as the paparazzi (as always) so daddy was in charge of taking the kiddos out on the ice... Jamison had a BLAST! But he never really stood up on his own Haha Daddy had to drag him around the rink.

 Makayla was surprisingly a good sport! At first she clung to the wall of course. I mean it has been like 4 years since we last took her ice skating! She fell multiple times but still got back up and continued to skate. Eventually she was skating in the middle of the rink all by herself and begging daddy to fling her around to make her go faster. She has now requested that in our next house we find one that has a pond.... so that she can go ice skating in her own backyard.. Papa... better get on that! LOL When we got home we warmed up with some hot cocoa and watched Ice Princess via Makayla's request. All in all, a wonderful day!

Tuesday, December 27, 2011

Christmas at the Ferg's


Christmas this year was good as always... The only thing that could have made it better would have been to spend it with family :( But our very good friends Nikki and Luke came over in their jammies and joined us for Christmas breakfast before tearing into the presents... It only took the kids 20mins to rip through this pile (of which we counted 25 presents for each kid and 15 "shared" presents") Seems like so much to have been over so quickly!!! But the expression on their faces... Especially Jamison! Priceless!
Makayla got hair stuff, jewelry, barbies, squinkies, zhu zhu pet stuff, roller blades, a bedazzler, and books among other things.. Jamison got hot wheels.. lots of them! Wall tracks, cris cross crash, cars and all the accessories to go with, nerf guns, and toy story action link things. Together they added on to their ever growing food collection for the pretend kitchen and of course our game stash :)

The floor was riddled with toys!

And as you can see the aftermath.... We were even good and broke it down the Korean way! Plastic in one bag paper in another and cardboard in the box :) Awwww how eco friendly are we! LOL So, anywho... Hope yall's Christmas was as good as ours!!!
Merry Christmas!!!

Mr. Jingles the Christmas elf..

So, I realized not to long ago (through Facebook) that a lot of our family doesn't know who Mr. Jingles is! That's a shame! Haha No, really it just means we've been out of touch over here for to long! So, I would like to introduce everyone to our adopted elf, Mr. Jingles!

Why did we adopt an elf you say? Well, have you ever wondered how Santa knows who is naughty and who is nice? Well, Mr. Jingles along with other elves, is a very special tool that helps Santa know who to put on the Naughty and Nice list!

You see, Santa sends his scout elves out to Elf Adoption Centers. Waiting for their families to bring them home, these patient elves hibernate until a family adopts them and gives their elf a very special name. Once named, each scout elf will receive its Christmas magic. Only excellent listeners and even better observers can be elf scouts because these scout elves are the eyes and ears of Santa Claus. Although they cannot be touched, or else they may lose their magic, the elf will always listen and relay messages back to Santa. Taking in all the day-to-day activities around the house, no good deed goes unnoticed; these scout elves take their job seriously. Each night, after the family goes to bed, the scout elf uses his magical Christmas powers to fly back to the North Pole. Once there, the elf will make his or her daily report to Santa and visit with elf friends where they will tell stories about their beloved families, play with the reindeer, and of course, sneak some of Mrs. Claus’ cookies! Our suggesting that the kids make their own!

Before the family awakes each morning, their special scout elf will fly back to their home from the North Pole. However, since these elves like to play games, don’t expect to find them in the same spot!  While some like to hide in the freezer (probably because it reminds them of the North Pole)

and others prefer to sit on the fireplace mantle or hang from the chandelier,

these elves love to play hide-and-seek with their families. Sometimes he can even be caught red handed doing his naughty deeds, we like to call this "elf mischief" and we must then report it right away to Santa!


On Christmas Eve, the scout elf will listen for Santa’s bell and then fly back to the North Pole. He isn't gone forever! Oh, no! The elf scouts job continues throughout the year! So, Mr. Jingles will be back periodically throughout the year to check in on the kids bringing letters from Santa and reporting back with their behaviors. So this means the kids have to be on their best behaviors ALL year round because you never know when the elf scout will return!

So, now you know how Mr. Jingles came along :) So, when our kiddos tell you about surprise visits from Mr. Jingles... LOL You can go along with it ;)

Bacon Cheesecake

While this sounded like it would be yummy... It was WAY to bacon-y.. While the birthday boy enjoyed it if I had to make this again I would say decrease the bacon by at least HALF and prolly drizzling it with some sort of maple syrup would probably be really good. Anyway... Here it is!

What you will need:
1/3 Cup of melted butter
1 Box of cinnamon graham crackers or 1½ Cup crushed cinnamon graham crackers
26 oz, 3¼ packages, cream cheese
One 14oz. can sweetened condensed milk
2 tsp. vanilla extract
2 eggs
3 pounds of bacon, cooked and crumbled (yet 3lbs is to much)

What you will do:
I cooked my bacon in batches in the oven because I hate frying it, but the first step is to cook the bacon. So, take a cookie sheet and cover it with aluminum foil and place the strips of bacon on it to cook at ohhh say 400ish for about 15-20 mins until it's done; not floppy but not burnt either. Then take it out and put it on a plate with paper towels and try to get as much grease out of it as possible. You don't want you cake to be greasy... Bleh...
Next step is to make the crust. Combine the butter and crushed graham crackers and then press into bottom of a spring form pan.
Then mix all of the remaining ingredients adding the bacon after everything else has been mixed together. Pour the filling over the graham cracker crust and then bake the cheesecake at 400 for an hour. Once the hour is up turn off the oven and open the oven door slightly and leave the cheesecake in there for another hour to slowly cool down.. Then place the cheesecake in he fridge for 6hrs or until firm and it's ready to eat :) Enjoy... All while having a heart attack! LOL

Tokyo, Japan

So, I know everyone has been asking about our trip and how Japan was.. I just have to say it was AMAZING! A very expensive city, but still amazing none the less. I am actually very grateful we got extended for a few more months because had we not, we wouldn't have been able to make it to Tokyo... And that would have been a shame! Haha To miss out on an opportunity to visit another Disney park! Oh yea... I prolly would have cried about it for a little while.. So.. Here are the highlights of the trip!

Our first stop was of course to our hotel room, or should I say closet, to drop off the bags. No scratch that I think my closet is actually BIGGER than our hotel room was... When they told me rooms in Japan are smaller than we are used to they ain't lyin! This pic was taken with me standing in the doorway..
Whew... glad we didn't go there with the kids! LOL They for sure wouldn't have been able to fit in the room!

Our first stop was the Tokyo Tower. Since its opening in 1958, at 333m, the Tokyo Tower has been the world's tallest self-supporting steel tower (The Eiffel Tower is only 320 m high). One hundred and seventy-six floodlights installed in various parts light up the Tower. And as you can see... It's pretty bright! This was taken from about 4 blocks back :)

Unlike the Seoul Tower and the Space Needle, which we have previously visited, this tower has 2 observation decks you have to pay to go up to.. The first deck is at 150m up where the view looks like this....

The second deck is 250m up and looks even more amazing! Like this...
Ahhhh sometimes I just LOVE my camera!!!!!!!! (okay, okay and the armature photographer behind it)

Next stop was of course Disney.. Which I could BORE you with pictures from of course because I LOVE Disney! We had a blast! Jake and I got to ride all the big rides together which is something we have never been able to do, so we had a great time!

One thing I DO suggest if you ever make it to Tokyo DisneySea is to try the popcorn! We didn't realize they had so many flavor until we turned a corner and smelt something oh so very yummy smelling so we went to investigate... Strawberry popcorn! YUM! This started an investigation... What other flavors of popcorn are there? Well, we tried black pepper, caramel, chocolate, strawberry, curry, milk tea, and cranberry... All equally yummy! I am now on a mission to figure out how to make my very own strawberry & cranberry popcorn! Hahah

The next stop was Shibuya Crossing.. Don't ask why.. One of Jake's Request. I guess they filmed part of one of the way to many Fast & Furious movies here? Any who... We walked around a lot... seen the sights... found an AWESOME sushi-go-round restaurant. It was pretty cool :)
The next day we stayed close to our hotel (which was in Asakusa) because it had rained the night before and it was really chilly on that day. We seen lots of markets and ran into a very cool temple, Sensoji, also known as Asakusa Kannon Temple. It is one of Tokyo's most colorful and popular temples.

The legend says that in the year 628, two brothers fished a statue of Kannon, the goddess of mercy, out of the Sumida River, and even though they put the statue back into the river, it always returned to them. Consequently, Sensoji was built nearby for the goddess of Kannon. The temple was completed in 645, making it Tokyo's oldest temple. When approaching the temple, we enter through the Kaminarimon(Thunder Gate), were there was this LONG(over 200m) stretch of shopping on both sides of the street called Nakamise.

Among the tons of interesting foods and goods to be seen and tried here, the culture radiates! It is gorgeous through and through! Def recommend checkin this place out!

Another request on Jake's to-do list was to watch a sumo match. Unfortunately, sumo wrestling only goes on in select months out of the year and December is not one of them, so we were told we MIGHT be able to see a practice.... Just our luck however, the week we were in Tokyo happened to be the week they are prepping the rings for competitions to start back up in January :( So, we DID go to one of the practice gyms... and we SEEN the wrestlers... but not fighting :(

And the last thing on our "we HAVE to do this while we are in Japan" list was to eat blowfish... Or pufferfish as Jake kept calling it... Now, hold on.... go ahead and breath! We DON'T have a death wish! Haha


Blowfish... Or "Fugu" in Japanese can be lethally poisonous due to its tetrodotoxin IF PREPARED WRONG... Therefore, it must be carefully prepared to remove toxic parts and to avoid contaminating the meat. The restaurant preparation of fugu is strictly controlled by the law in Japan, and only chefs who have qualified through rigorous training are allowed to deal with the fish. Since 1958, fugu chefs must earn a license to prepare and sell fugu to the public. This involves a two- or three-year apprenticeship. The licensing examination process consists of a written test, a fish-identification test, and a practical test, preparing and eating the fish. Only about 35 percent of the applicants actually pass. It is most often the domestic preparation which occasionally leads to accidental death. Now that we have THAT cleared up.. The reason it was on our "MUST do in Japan" list is because only seventeen restaurants in the United States are licensed to serve fugu, twelve of which are in New York. HOWEVER, The fugu is cleaned of the most toxic parts in Japan and then freeze-flown to the USA to be served, so therefore... the best place to try it is of course where it's fresh, right!

 Okay.... So that was our trip in a nutshell! Hope yall enjoyed!

Friday, December 9, 2011

10 Christmas Jello Shots!

Some of these are pretty tasty... So are just for looks (because they look cool but they really taste like crap) But hey? If your serving jello shots MOST people don't really care how badly they taste! I mean wen you bring that tray out and everyone screams "JELLO SHOTS!!!!" It means everyone already drunk enough they probably won't even remember what the darn things tasted like! LOL

This is a Christmas Tree (not so tasty, but then again I'm not a fan of lime jello so of course that's my opinion)

What you need:
2 cups boiling water
1 6oz package of lime jello
1 cup cold water
1 cup vodka
splash of bourbon
red sugar sprinkles

What you will do:
This one is pretty simple! Pour boiling water over Jello and whisk until combined. Slowly whisk in cold water, vodka, and a splash of bourbon. Pour mixture into cups and refrigerate until set. Sprinkle with red sugar before serving. If you sprinkle the sugar before it WILL run and it looks pretty gross LOL


This one is called the Fruitcake (pretty tasty but it's got the fruit in it which makes the texture kinda funky)

What you will need:
6 oz package of raspberry jello
2 cups boiling water
1 1/2 cups of cold water
1/2 cup spiced rum
maraschino cherries quartered
apricot pie filling

What you will do:
Stir jello into boiling water until dissolved. Stir in cold water and rum. Place a quartered cherry and a spoonful of apricot pie filling in bottom of each shot glass. Pour in jello mixture to top of glass. Chill until set.


The Apple Pie (pretty darn tasty!)

What you will need:
1 1/2 cups apple juice
1 1/2 cups apple cider
4 envelopes of Knox unflavored gelatin
1 cup vodka
2 tbsp sugar
Garnish:
whipped cream
cinnamon
maraschino cherries

What you will do:
Combine apple juice and apple cider and heat until boiling. Sprinkle gelatin over cold vodka in large bowl; let stand 1 minute. Add hot juice and stir until gelatin completely dissolves, about 5 minutes. Stir in sugar until dissolved. Pour into 9x13x2-inch pan or into individual shot glasses. Refrigerate until firm, about 3 hours. Top each serving with whipped cream, sprinkle with cinnamon and top with a cherry.


Sugar Cookies (not to shabby)

What you will need:
2 cups water
4 envelopes of Knox unflavored gelatin
8 oz of Bailey's Irish Cream
4 oz of Butterscotch Liqueur
2 oz of Cointreau Liqueur
1/4 cup cold water
garnish
whipped cream
sugar decorations (like the Wilton Christmas sprinkle tube)

What you will do:
Boil the 2 cups of water in a saucepan. Remove from heat and stir in the gelatin until completely dissolved, about 3 minutes. Stir the Irish Cream, Butterscotch, Cointreau and cold water into the hot gelatin. Pour contents into shot glasses with enough room to add whipped cream later. Refrigerate until firm. Spoon or pipe whipped cream on top and decorate with sugar decorations or colored sugar.

We call this one Jingle Bell Rock. It takes a little bit more time because you have to do each layer individually but it looks pretty cool... And it's okay for taste. Not the worst I've had anyway?

What you will need:
Red layer
2/3 cup cranberry juice
1 packet of Knox gelatin
1/3 cup vodka

Green Layer
2/3 cup water
1 packet of Knox gelatin
1/3 cup sour apple pucker
green food coloring (to make it darker)

White Layer
1 can sweetened condensed milk
1 cup boiling water, divided
2 packages of Knox
1/2 cup cold water
3/4 cup peppermint schnapps

What you will do:
To prepare the Red Layer: Pour cranberry juice into saucepan, sprinkle gelatin over top, let sit 3 minutes. Heat mixture and stir until gelatin is dissolved. Remove mix from heat, cool to room temperature. Stir in vodka. Pour into shot glasses and refrigerate while preparing other layers.

To prepare the Green Layer: Pour water into saucepan, sprinkle gelatin over top, let sit 3 minutes. Heat mixture and stir until gelatin is dissolved. Remove mix from heat, cool to room temperature. Stir in Apple Pucker and a few drops of food coloring if needed to achieve desired green color. Once the red layer is completely set, pour the green layer on top and refrigerate until this layer is set.

To prepare White Layer: Mix 1 can sweetened condensed milk with 1/2 cup boiling water. In a small bowl sprinkle 2 packages Knox gelatin over 1/2 cup cold water. Let stand a few minutes, then add the remaining 1/2 cup boiling water and stir to dissolve gelatin. Add gelatin mixture to milk mixture and stir to combine. Cool to room temperature. Mix in the peppermint schnapps. Pour over the set red and green layers and refrigerate until the white layer is set.

Garnish with crushed red and green jolly ranchers.

This one is called Blue Christmas but uhh yea it was not so good (in  my books)... It's cute! LOL

What you will need:
1 3oz package of berry blue jello
1 cup boiling water
3/4 cup Blue Curacao Liqueur
1/4 cup sparkling champagne
1 cup mini mallows cut into 4's
mini blueberry candy canes (optional)

What you will do:
Dissolve the 3 ounce jello packet into the boiling water. Let it sit until it is room temperature. Mix in 3/4 cup blue curacao and 1/4 cup sparkling champagne. Pour 1/2 of liquid into portion cups - only fill each portion cup to 1/2 full. Add one layer of mini marshmallow quarters to each cup. Place Saran Wrap around each cup and wrap with a rubber band securely. Lay each cup horizontally in the refrigerator until the jello is set, about 2 hours. Then, remove the Saran Wrap and fill the other 1/2 of each cup with the rest of the jello/liquor liquid mix. Put each cup back into the refrigerator until completely set (You do not need to add the Saran Wrap to these). Optional: Right before serving, add a blueberry candy cane into the side of each shot.

Mistletoe (once again the lime jello but overall it's not to shabby)

What you will need:
1 3oz package of Lime Jello
1 cup boiling water
1/2 cup Apple Pucker
1/2 cup Absolute Vodka
1 tsp chopped mint leaves
Garnish
whipped cream
whole mint leaves
cinnamon Red Hots

What you will do:
Dissolve jello in 1 cup boiling water. Add apple pucker, vodka and chopped mint. Pour mixture into shot cups and refrigerate until set. Garnish top with whipped cream, whole mint leaves and red candies.


Eggnog! (By far my fav! well... and the candy cane one which is still to come but still YUMMY!)

What you will need:
1 cup eggnog
1 package of Knox gelatin
3/4 cup spiced rum or brandy either works well :)
1/4 cup coconut milk
1/2 tsp vanilla
1/4 tsp cinnamon

What you will do:
In a small saucepan, bring eggnog to a boil. Pour eggnog into a heatproof bowl. Sprinkle unflavored gelatin over the eggnog and let sit for a minute. Stir until gelatin is dissolved; allow to cool. Add rum, coconut milk, vanilla extract, and cinnamon; stir until well combined. Pour the mix into shot glasses and refrigerate until firm.

Garnish Ideas: Whipped cream and holiday sprinkles, mini candy canes or cinnamon sticks.


Candy Cane (As I said before pretty darn yummy!)

What you will need:
Red Layer
2- 3oz packages of cherry jello
1 1/3 cup of boiling water
2/3 cup Hot Damn Liquor

White Layer
1 can sweetened condensed milk
1 cup boiling water
2 packages of Know gelatin
1/2 cup cold water
3/4 cup Peppermint Schnapps

What you will do
Red Layer Instructions: Mix 2 packages cherry flavored jello with 1 1/3 cups boiling water. Stir jello until dissolved. Allow to cool and stir in 2/3 cup liquor.

White Layer Instructions: Mix 1 can sweetened condensed milk with 1/2 cup boiling water. In a small bowl sprinkle 2 packages Knox gelatin over 1/2 cup cold water. Let stand a few minutes; add remaining 1/2 cup boiling water to dissolve gelatin. Add gelatin mixture to milk mixture and stir to combine. Cool to room temperature; add 3/4 cup peppermint schnapps and stir to combine.

Layering the Jello Shot: Rotate a white layer and then a red layer making sure to refrigerate each layer until set. Garnish each shot with whip cream, crushed candy canes, and red sprinkles.

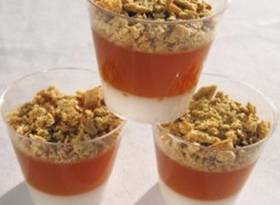
Lastly we have the Pumpkin Pie (not a fan of pumpkin pie so I didn't even try this one sorry!)

This recipe calls for Agar Agar which is derived from two species of red algae in the Rhydophyceae family, Gelidium and Gracilaria . The powdered form is an excellent gelling agent and thickener in a variety of foods and Arrowroot powder which is an excellent thickening for delicate sauces and soups. Together they help to set the jello shot like Knox would. I saw online that 1 T. gelatin = 1 tsp. agar agar powder. However, I haven't experimented to see how much Knox it would take to make it set up right, so if you choose to take that route please let me know!

What you will need:
White layer
1 5.6 oz can of coconut milk
1/2 cup water
1/4 cup sugar
3 tsp Agar-agar
1/4 tsp arrowroot powder

Pumpkin layer
1/2 cup water
1/2 cup sugar
6 tsp Agar-agar
1/2 tsp arrowroot powder
1/2 cup canned pumpkin
1 tsp pumpkin pie spice
1/2 cup spiced rum
Graham cracker layer
2 sheets of graham crackers
1 tbsp butter

What you will do: White Layer: Combine coconut milk, water, sugar, agar-agar, and arrowroot powder in a small saucepan. Heat over medium-low setting until liquid begins to boil. Remove from heat. Pour liquid into shot glasses and refrigerate until set.

Pumpkin Layer: Combine water, sugar, agar-agar, and arrowroot powder in a small saucepan. Heat over medium-low setting until liquid begins to boil. Remove from heat and stir in pumpkin, pumpkin pie spice and spiced rum. Pour pumpkin layer over set white layer and refrigerate.

Graham Cracker Layer: Crush or blend graham crackers to form crumbs. Melt margarine. Combine graham cracker crumbs and margarine. Garnish each shot glass with a spoonful of graham cracker crumb mixture.

Enjoy!!!


Bacon Vodka

Now this is something that we both said, "Ok, we HAVE to do this!" His obsession with bacon and my obsession with cooking with alcohol Ummm Hello? Perfect match! Haha


This was just for picture sake! Making this stuff is actually pretty disgusting!

What you will need:
1 package of bacon of your choice
Skillet
Cutting board
Sharp knife
Stove top or hot plate
Glass pitcher, NOT PLASTIC, or sizeable equivalent (pitcher will really help when it comes time to pour)
Freezer
Some sort of filter - like a mesh strainer or a grease guard that you put on top of bacon while it's cooking. I suppose you could also use a coffee filter too.
Glass container of sufficient size to hold your final product (I poured mine back in the Smirnoff bottle)
Open up your package of bacon, and begin to slice it into smallish pieces, about 1/2" x 1/2" Cook up the bacon in a skillet. Pour the bacon grease and all into a glass pitcher or sizable equivalent and then mix in the vodka!!!! Seems easy enough right?
Now we'll put the vodka into the freezer for at least 30 minutes and then comes the gross part!
Take the vodka out of the freezer, and remove what I like to call the moon pie of bacon fat that has congealed at the top of the pitcher. Filter the bacon bits and other floaty pieces out of the vodka by pouring it through a strainer of some sort. I started with a mesh strainer to remove all the bigger pieces, then I started pouring it through a finer filter to get out the small stuff. I used the grease guard that I normally put over skillets when I'm cooking things that shoot off hot grease.
I recommend repeating this step several times to remove as many particulates as you possibly can
Pour your vodka into a fancy glass container (or back into the bottle), and then enjoy!
Now what kind of drinks can you make with bacon vodka you say? Well... We've only tried a few but I suggest: 
Chocolate Bacon Martini:
2 oz of Bacon Vodka
3/4 oz of Godiva Chocolate  Liquor
Splash of Half & Half
Shake all with ice and strain into a martini glass

Bacon Bloody:
2 oz of Bacon Vodka and your favorite Bloody Mary mix.  If you normally like your Bloodies spicy...I'd lay off the spice this time because the bacon is the star of this show

Enjoy!

Bacon Chocolate Chip Cookies

These little boogers are surprisingly really good!! I made these a long time ago for an FRG fundraiser. We were looking for something different that would appeal to all the guys who say they "don't like sweets" because we were having a problem with the bake sales. So I mean what guy can say NO to a cookie with bacon in it? Haha I had to play with the recipe for a little while because the first one didn't even have a hint of bacon... SO I added MORE bacon! LOL


What you will need:
1 stick of butter
1/2 cup of brown sugar
1/2 cup of granulated sugar
1 egg
3/4 teaspoon vanilla
1 1/8 cups of flour
1/2 teaspoon salt
1/2 teaspoon baking soda
1 cup of chocolate chips
1/2-1 cup of bacon (I used 6 slices and got a little more than half a cup)
Playing with the recipe I found that adding an extra 1/8 cup of flour and an extra 1/4 teaspoon of baking soda creates fluffier, less flat, cookies. Totally up to you! 
Now it's time to fry up some bacon. This should be pretty simple, just be careful not to burn yourself with any hot grease. I HATE frying bacon! When your bacon is looking done, move it to a plate and use some paper towels to blot the grease. We don't want greasy cookies! Before you start mixing up the ingredients, now is a good time to preheat your oven to 375.

Once that's done, throw your stick of butter into the mixing bowl. Measure out 1/2 cup of brown sugar and add it to the butter in the bowl. Do the same for the (white) granulated sugar, and add it to the bowl, as well. Mix those up with the beater. Crack open the egg, and add it to the mixing bowl. Then measure out 3/4 teaspoon of vanilla and add that to the mixture.Use the beater to mix up the ingredients.
In another bowl, we need to mix together the flour, baking soda, and salt. Measure out 1/2 teaspoon of salt, and 1/2 teaspoon of baking soda, and add those to the new bowl. Then measure out the 1 and 1/8 cup of flour, and add it to the new bowl. Mix everything up with a clean spoon, then add the mixture to the bowl with the rest of the ingredients in it.

Then it's time to add the chocolate chips and bacon. However, you need to cut up your bacon. By now, they should be relatively grease free, and much easier to cut up. Dice them up into chucks, it's easier to do them all at one time. With 6 slices I ended up getting a little more than 1/2 cup of bacon. So I used 12 slices with the second recipe and it worked out pretty good. However, I wouldn't suggest going over a 50:50 ratio of chocolate to bacon. Then it gets pretty gross. Add the bacon to the mixture, and mix it up by hand using a spoon.
If you put the dough into the fridge or freezer for 15-30 minutes to let it rest it helps a lot :) 
So then, we'll be baking our cookies at 375 degrees for 9-10 minutes. They might take a little longer, but I'm sure you can figure it out. Your going to want to keep your scoops of dough to about a tablespoon. The cookies end up flattening out quite a lot, so keep about 2-3 inches between scoops.

Then pop them in the oven. To tell when they are done, you can check that the centers of the cookie to make sure they aren't gooey. The edges should also be nice and crisp.

Once they're done, pull them out and let them cool.


Thursday, December 8, 2011

Bacon Baklava

This was indeed the reason I started this blog (well the amount of people asking for the recipe) so I figured it should be my first ACTUAL post :)
Thing you will need:
1 1/2 pound(s) sliced bacon
1 cup(s) whole blanched almonds, toasted and coarsely chopped
3/4 cup(s) coarsely chopped dates
1 package phyllo dough
10 tablespoon(s) unsalted butter , melted
1 1/2 cup(s) sugar
1 cup(s) pure maple syrup
1/2 cup(s) water
2 tablespoon(s) bourbon
Finely grated zest of 1/2 orange

What you will do:
1. Preheat the oven to 400 degrees F. In a skillet, fry the bacon in batches until crisp. Drain well and crumble. In a food processor, finely chop the bacon with the almonds and dates.
2. Butter a 9-by-13-inch metal baking pan. Lay a sheet of phyllo in the pan; trim the edges to fit and brush with butter. Repeat with 4 more phyllo sheets and butter. Spread 1 cup of the filling evenly over the phyllo. Repeat this layering of 5 phyllo sheets and bacon filling two more times. Top with 5 buttered phyllo sheets, buttering the top well.
3. With a small, sharp knife, cut the baklava into diamonds. Bake the baklava for 10 minutes. Turn the oven to 325 degrees F and bake for 1 hour longer, or until nicely browned.
4. Meanwhile, combine the sugar, maple syrup, water, bourbon and orange zest in a saucepan and bring to a boil. Simmer for 5 minutes, then let cool to room temperature. Pour the cooled syrup over the hot baklava and let stand at room temperature uncovered overnight.
5. Enjoy!

Starting fresh...

So, for about 2 years now I have been debating this whole blogging thing. Gotta give credit where credit is due so the idea was actually sparked by my former MIL. She sent me a blog of one of her daughters friends and was like "You are really creative you should do something like this. Then we can keep up with the kids" I thought to myself "Bleh... who wants to read about MY life?" However, the idea was again brought up by one of the hubby's family members about 6 months later. Since my cake business took off so well in Korea I was "made" (hubby's idea) to open up a Facebook business site. But while I like to make cakes, I don't like to make them in the abundance that I have here!!!  Any who, this family member said "You should really blog about your techniques and how you make these neat cakes" But then again, I don't really have any "techniques" so to say... I just think up and idea and go with it.. Sometimes it doesn't always turn out well! Thank goodness my family is pretty understanding and they eat my mistakes without commenting on them much :) However, it wasn't until recently when I started making these crazy outrageous (mostly bacon and/or alcoholic involved) creations that I get so many requests for the recipes and/or instructions on how I did it, that I decided to go on with this blog thingy... So, part of this will be via the first request... Milestones of the kids... And the other half (okay probably more like 3/4's) will be about my creations in and out of the kitchen :) Enjoy!